IRIX 3.3 installation
How to install IRIX 3.3.2 on an old SGI?
Some time ago, I picked up an old SGI Personal Iris 4D/35 workstation. This is a little report about getting it back to life.
What I had:
The Personal Iris is a workstation from the late 80ies or very early 90ies. My system was made in 1990. The 4D/35 was the top of the line machine featuring a MIPS R3000 CPU at 36MHz. It also had „Turbo“ graphics with the 24bit color upgrade and z-buffer. There was a 1GB harddisk in the machine with IRIX 5.3 installed. Unfortunatly, the disk was broken and gave lots of I/O errors. It was clear that I had to replace the harddisk and reinstall IRIX.

How are you supposed to install an old Iris?
Back in the days, you would have looked for the installation tapes. For a 4D/35 you need a special support tape because it‘s too young to be supported by the plain 3.3.2. Then you need a bunch of different tapes to completely install the system. The basics are on the eoe1 and eoe2 tapes. This will give you a basic system with graphics and everything needed to run some applications. If you want to develop software, you need the development option, also maybe Fortran77. Then there is an NFS tape and the 4D35 support tape finally adds the necessary bits to run on that special hardware. I‘m no fan of magnetic tapes and my Personal Iris didn‘t even come with a tape drive. Fortunatly, you can install everything from the network.
the boot server
Any IRIX machines can act as a boot server. There are already numerous descriptions of how to configure an IRIX installation server. The short version is like this:
- enable guest login. the user „guest“ must not have a password.
- enable bootp and tftp in /etc/inetd.conf
- put the installation tapes some place where tftpd and the guest user can access them.
- fix the „-s“ flag for tftpd in /etc/inetd.conf by adding the path to your installation tapes.
- put the clients IP and name in /etc/hosts
- put the clients ethernet address in /etc/ethers
In my case, the boot and install server is a Challenge S running IRIX 6.5.22m with IP 192.168.2.46.
installation media
Each software set consists of a few individual files like this:
# ls -al eoe1*
-r--r--r--    1 root     sys         16384    Feb  4  1991 eoe1
-r--r--r--    1 root     sys         212992   Feb  4  1991 eoe1.idb
-r--r--r--    1 root     sys         2621440  Feb  4  1991 eoe1.man
-r--r--r--    1 root     sys         37355520 Feb  4  1991 eoe1.sw
normally, all these files would be on a tape. Most often people don‘t have the tapes anymore, but simply those extracted filesets. IRIX includes a nice tool named „distcp“ which can backup tapes to a local directory. A problem is that distcp changes the product descriptor of the software set, so the extracted files can only be installed on the version of IRIX that you have used to backup the tapes. If, for example you have used IRIX 5.3 to backup some IRIX 4.0.5 tapes, the extracted files can only be installed on IRIX 5.3. Of course, this is a real problem, because when you want to install 4.0.5, you won‘t have 5.3. Fortunatly, it is possible to fix that. In any fileset, the small file without any extension defines on what versions of IRIX the software can be installed on. Right at the beginning is something called the product descriptor. Using a hex editor, you can look at it and modify it. This is a list of different product descriptors:
IRIX 6.5:   pd001V630P00, patch 5086 introduces pd001V650P00
IRIX 6.4:   pd001V630P00
IRIX 6.3:   pd001V630P00
IRIX 6.2:   pd001V620P02
IRIX 6.1:   pd001V610P00
IRIX 6.0.1: pd001V512P00
IRIX 5.3:   pd001V530P00
IRIX 5.2:   pd001V511P00
IRIX 5.1.1: pd001V500P00
IRIX 4.0.5: pd001V405P00
IRIX 4.0.1: pd001V400P15
IRIX 3.x:   nothing
very often, old IRIX tapes were copied using IRIX 5.3. If the product descriptor doesn‘t match the version of IRIX you want to install, you can change it with a hex editor. IRIX 3 is special, because it doesn‘t use a product descriptor at all. If you have IRIX 3 filesets which have a product descriptor and therefore won‘t install, simply delete the product descriptor. If all the filesets are repaired, move them into a common directory like /export/irix/dist.
setup /etc/bootptab
The default looks like this:
IRIS 1 01:02:03:8a:8b:8c 192.0.2.1 unix
modify it like this:
bor 1 08:00:69:06:0a:51 192.168.2.47 /export/irix/dist/sa(sash.IP12)
the „sa“ file is a container file that includes many files needed to boot and install the system. Many of those are machine specific. sash.IP12 is the standalone shell for IP12 hardware like my 4D/35.
boot the client

Now, we can boot the Iris. get into the PROM and set a few variables:
>> setenv notape 1
this is important, because the old hardware tends to fall back to using tapes. We don‘t want this to happen
>> setenv netaddr 192.168.2.47
The system won‘t boot if the local IP address isn‘t set.
>> boot -f bootp()192.168.2.46:/export/irix/dist/sa(sash.IP12)
it should then load the standalone shell and leave you at the „sash:“ prompt.
sash: boot -f bootp()192.168.2.46:/export/irix/dist/sa(fx.IP12) --x
this will load the disk partitioning tool. Make sure you adjust the size of the swap partition. After partitioning the harddisk, restart and go back into the PROM monitor.
>> setenv notape 1
>> boot -f bootp()192.168.2.46:/export/irix/dist/sa(sash.IP12)
sash: setenv tapedevice bootp()192.168.2.46:/export/irix/dist/sa
sash: install
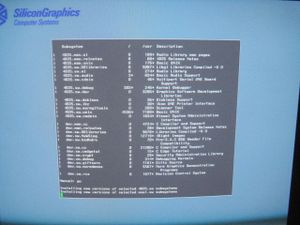
The installation process should start now. The system will copy the miniroot from the „sa“ file to the swap partition of the harddisk. After that, it will reboot into the miniroot. With IRIX 3 you have to choice of an automatic or manual installation. Choose manual. You will be dropped into „inst“, the IRIX installation tool. Choose the installation source with „from“. Just give the /export/irix/dist path on the server. It will read all the filesets. There is not much of a difference to other IRIX installations. choose to install everything with „install *“ and „go“. When everything is done enter „quit“ and hope that it will successfully reboot into a working IRIX.
external links:
[1]http://software.majix.org/irix/install-oldsgis.shtml
[2]http://www.futuretech.blinkenlights.nl/netboot.html
special thanks to Gerhard and Jan-Jaap.